Maybe you remember back in February I made a
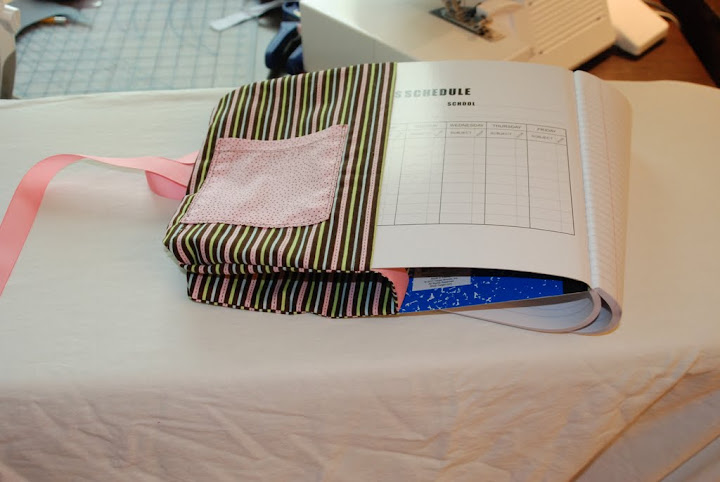
Ruffled Notebook Cover ?!?!?! It looked like this.
Oh yeah you say. . . I seem to remember you promising a tutorial . . . Yep, I had more to make and thought I would get to it soon. Now it is 6 months later and I am getting around to it. It might look like I was waiting for the notebooks to go on sale, but that would just be me trying to get around the fact that my craft room has been collecting dust for the most part. Something about a VERY mobile baby and other projects getting in the way.
With all that said I finally finished up the other notebooks I had cut out and so I have no excuse for not getting this posted now. Here they are in all their beauty!!!
Now for the tutorial. Drum roll please. Okay maybe not that much fanfare. I must put a funny side note on this tutorial - In my haste to finish the one for Liberty earlier this year, I forgot to finish taking pictures and so as you go through the pictures you will notice the fabric changes in most the pictures. My mistake. I am kind of spacey most days.
Another side note: I tend to explain things expecting you to know basic construction techniques. I am not very detailed, sorry. If you have questions then email me or leave a comment and I will respond to you.
Materials:
- Composition notebook (good to buy them now when they are under a $1 at some places - they can be over $3 off school season.)
- Main Fabric about 1/2 yard
- Coordinating fabric for ruffle and pocket - 1/4 to 1/3 yard
- Ribbon about 1 yard
Fabric Cutting:
Main fabric: CUT two of each size
- 16 1/2 inch by 4 inch (outside top and bottom)
- 8 inch by 11 inch (inside panel)
Coordinating fabric: CUT one of each size
- 40 inch by 5 inch (ruffle)
- 6 inch by 6 inch (pocket)
Ribbon: CUT two of each
- 12 or 13 inch pieces for ties
- 4 inch pieces for "binding"
How To:
Begin by taking ruffle piece and doing two rows of gathering stitches on both sides of the fabric.
Next attach ruffle to one of the main front fabrics, matching edges and then middles.
Then pull the threads to gather the material to the top fabric piece. Then sew along this edge. It will look like you are making a skirt for a minute now.
Repeat with the bottom piece of fabric.
Next step is to press the piece so the ruffles look more flat. I tend to pull the top and bottom pieces a little bit as I press. I also press where the ruffles meet the top pieces towards the non ruffled piece. It will make it easier to pull the ruffles better and also makes a place where we can top stitch.
Next topstitch about 1/8 to 1/4 inch from the ruffles.
Now pull out your pocket piece and press about 1/2 inch down on one side. You should probably finish the edge with serging, zigzag or cut with pinking sheers first. Once you have pressed it down you can stitch down the top of the pocket. I ran two stitches along the edge of where I had folded.
Now fold in all the edges about 1/2 inch and press with iron. Then hold on to this while we get the inside panels ready.

Take the inside panels and on the 11inch side finish the edge then fold over about 1/2 inch, press and stitch. Repeat for other piece.

Flip to the right side and pin the pocket on. I kind of center it top to bottom but put it closer to the sewn edge and then do a double row of stitches like I did on the top.

Here is a close up of what I mean.

Now we are ready to assemble our cover. Place inside panels with hemmed (sewn) edges in the middle and match sides and top together. There should be a gap between them.

Cut the ribbons to about 12 or 13 inches. Then pin them in where the seam on the outer edge. Make sure you place the ribbon in the center of the outer side seams. I try and match up the ribbons from the front to back so that they will match when you close the book.
Next take your note book. ( I try and make sure it is the one I am going to use for the end product in case they are a different size. ) I fold the fabric around it and find the center. Then open up the fabric and place the book on the one side. I take a pen and trace around the notebook - being generous with the lines. I carefully put the notebook on the other side and then repeat process.

Here is what I mean. (A closer view.)

Place the 4 inch piece of ribbon across the gap. I did this part wrong in this picture. The next picture shows how they should be. I put the ribbon across the gap and on the "line" that I have drawn before. Then you stitch around the entire thing starting and ending near one of the ribbons across the gap.
Now come the hard part. Before you clip or cut anything it is time to try it on. This is where I always cringe. Did I measure it right, did I sew it right. Make sure you have your friend the seam ripper near by. It is likely you will need it.
Here is the way I have to put it on. It always makes me cringe.
Anyway - once it fits you have one pretty simple step. I finish my edges by cutting them with the pinking shears. It makes it really nice when you go around the corners. You don't have to clip or cut the corners and it gives it a finish that won't unravel. I am careful to move my ribbon as I cut the fabric underneath. (see photo where I attached the ribbon above.)


(this has the ribbon wrong, although when I did this I didn't pick it out and it works, just adds a little bit of bulk in the spine area.)
Then you are done, you can go now and write notes in style. I think these might be fun for a high school or college age kid. I did give Kirsten one for helping me with cleaning up before Peter's party. She was a real trooper and I always feel sorry for the kid that doesn't get anything new.

These are fun to make but require a little bit of time to make them look nice. Always press when possible. I might suggest not using the stripes. It made it pretty obvious when my center ruffle wasn't exactly straight. But Kirsten didn't even notice. I didn't add the pencil/pen holder because I don't like mine and haven't been able to figure out a good method. I think with Liberty's and others I have just added a looped ribbon piece above where you add the ribbon for the ties. Just make sure that the ribbon will hold your pencil and is on the back part rather then the front near the pocket. I have added it after I get all done too, just unpick the area you want it and slip it in and then re sew the area.
I am pretty excited to get these done and now I can work on a new project. Hope you like it. Please email me with any questions or comment below.